
Parents arrive at the braces placement appointment expecting two things: some discomfort and a long list of foods their child won't touch again until treatment ends. Neither one decides how the next two years go. The part that decides it turns invisible the moment the chair is wiped down, and that's the bond between each small bracket and the enamel underneath it. A strong, well-seated bond lets the teeth follow the plan on schedule. A weak one that lets go in month three pushes the finish line back.
Most conversations about orthodontic brackets placement spend their time on the day itself, and the day is easy. The weeks after it are where families do the work that protects the result.
Table of Contents
- What Bracket Placement Involves and Why It Matters
- Direct Versus Indirect Bonding Explained
- Questions to Ask Before the Placement Appointment
- The Bonding Steps From Cleaning to First Archwire
- Why Brackets Loosen and How to Prevent It
- What Changes in the First Weeks and Months
- Book a Free Consultation at Stellar Orthodontics
What Bracket Placement Involves and Why It Matters
A bracket is a small attachment bonded to the front of a tooth. The orthodontist positions brackets across the teeth, then threads an archwire through them. The brackets hold the wire in place, and the wire applies planned pressure to guide tooth movement.
At Stellar Orthodontics, braces placement is a 60 to 90 minute appointment. Brackets are bonded to the front of each tooth, and the first archwire is placed. The appointment involves no injections, no drilling, and no pain.
Each bracket is held by a thin layer of adhesive. A review in the British Dental Journal notes that resin-composite bonding systems need shear bond strength of approximately 6–8 MPa to withstand functional and chewing forces. The condition of the enamel, moisture control, adhesive choice, and placement technique all affect the bond.
Accurate placement and a sound bond matter after the appointment, too. During the first months at home, families are learning how to protect brackets while their child adjusts to eating and cleaning with braces. A bracket that loosens may need repair, so follow the orthodontist's care instructions and contact the office if one feels loose.
The appointment can take different amounts of time depending on the case. Families can ask for an estimate during the consultation.
Direct Versus Indirect Bonding Explained
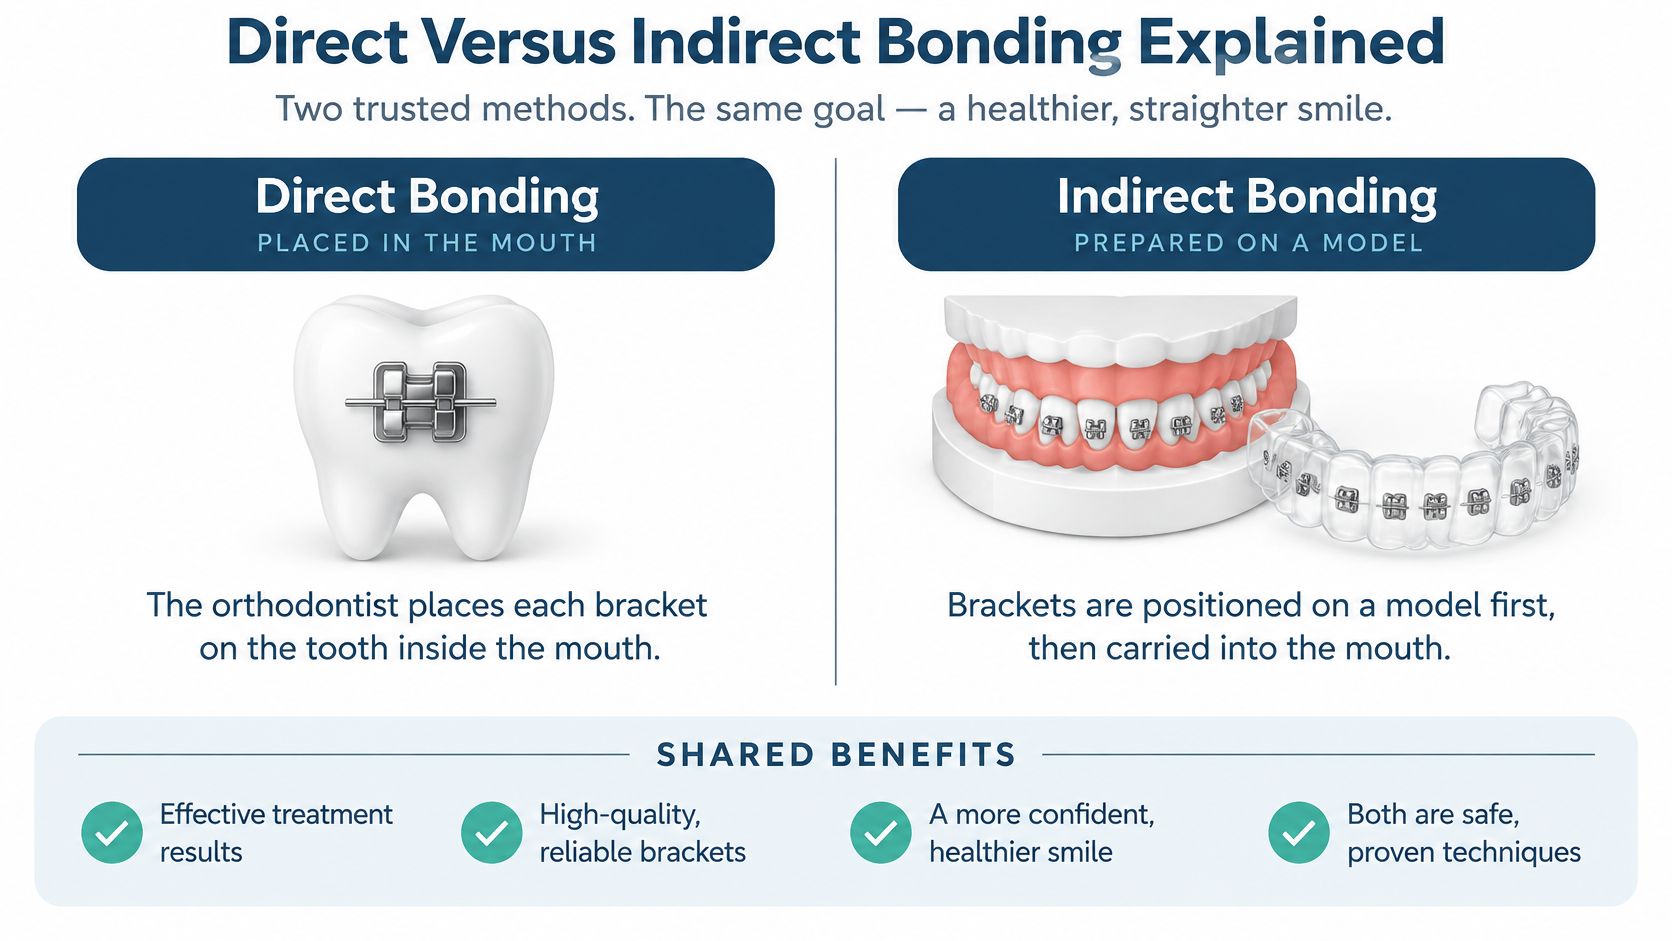
The two bonding methods differ in where the orthodontist positions each bracket: directly on the tooth or first on a model, then onto the teeth using a custom transfer tray. Both methods place brackets on the teeth, but the positioning process and chair time can differ.
| Factor | Direct bonding | Indirect bonding |
|---|---|---|
| Where brackets are positioned | On each tooth inside the mouth | On a model, then moved with a custom transfer tray |
| Translation accuracy (2024 split-mouth trial) | 0.73 ± 0.46 mm | 0.38 ± 0.27 mm (fully digital indirect) |
| Overall bond-failure risk (systematic reviews) | No significant difference from indirect | No significant difference from direct |
| Failure over treatment (systematic review) | Lower failure reported | Higher failure reported |
| Chair time | Longer, because brackets go on one at a time | Shorter, because a full arch is seated together after the tray is made |
| Best suited to | Single-tooth repairs, rebonds, and most routine cases | Full-arch cases planned digitally, or a patient who struggles with long chair sessions |
Reading the comparison row by row
Direct bonding means placing and positioning brackets individually while the patient is in the chair. With indirect bonding, the orthodontist positions the brackets on a model first, then uses a tray to transfer them to the teeth. The tray is like a jig in a workshop: it holds parts in planned positions during placement.
A 2024 split-mouth randomized trial published in Clinical Oral Investigations measured mean translation accuracy of 0.73 ± 0.46 mm for direct bonding and 0.38 ± 0.27 mm for fully digital indirect bonding. In that trial, the indirect method landed closer to the planned position on this measurement. That result does not mean every bracket will be placed more accurately with a tray.
Position is judged in more than one direction. A clinical study of a computer-aided bonding device compared 205 bonded brackets with accepted limits of 0.5 mm for translation and 2° for orientation. All measured deviations stayed within those limits except torque, where 15.12% of brackets exceeded a 2° deviation. A bracket can appear well placed and still need later adjustments to refine tooth position.
Where accuracy gains stop mattering
Placement accuracy and bond strength are separate questions. A 2022 systematic review of bonding techniques found broadly comparable early adhesion between the methods, with direct bonding showing a lower failure rate over the longer 12-to-15-month follow-up. The review screened 3,096 articles, and only 7 met its criteria, highlighting the limited evidence available for comparing techniques.
A 2025 review of digitally assisted placement reported that custom CAD/CAM bracket systems may reduce treatment time by roughly three to four months on average. It found no clear superiority in final alignment or occlusal quality, and no consistent difference in early bond failures.
The transfer tray itself also affects the result. In a 2024 randomized trial of 30 patients published in the International Journal of Dentistry, 69.17% of brackets placed with a 3D-printed indirect-bonding tray sat more gingivally than planned. A carefully designed plan still depends on the tray transferring bracket positions as intended.
Neither method is automatically right for every case. The choice can depend on how many teeth need brackets, their positions, how long the patient can comfortably sit, and which method the orthodontist can control reliably for that case.
Questions to Ask Before the Placement Appointment
A useful consultation gives you time to understand the choices and plan for the first weeks at home. Ask the orthodontist who would treat the case how the recommended approach fits your child's teeth and treatment goals.
- Which bonding method do you recommend for this case, and why? Ask how the choice relates to the teeth that need brackets and the treatment plan.
- How long will the appointment take? Braces placement usually takes 60 to 90 minutes. Knowing the expected length helps you plan around school and travel.
- Which bracket materials are available? Traditional braces use metal brackets; clear ceramic braces use tooth-colored brackets and have a lower-profile look. The choice depends on priorities such as appearance and budget.
- What should we do if a bracket or wire needs attention? Ask how to contact the office and what steps to take if a problem comes up outside regular hours.
- How often are adjustment visits, and how long do they last? Visits are typically every 6 to 8 weeks and last about 30 minutes, which can help with calendar planning.
- Will the same orthodontist see us at each visit? Knowing who will follow the case helps you understand how care is coordinated.
- How will you check progress, and what treatment length do you expect? Most braces cases finish in 18 to 30 months, though the estimate varies with the individual case.
Before the appointment, you can also review how to prepare for braces and note any practical questions about eating, school, or photos.
Worth writing down: the instructions for what to do if a bracket or wire needs attention after hours.
The Bonding Steps From Cleaning to First Archwire
The bonding appointment runs in a fixed order, and every step exists to protect the one before it. Here's the sequence with the reason behind each and the mistake that most often undoes it.
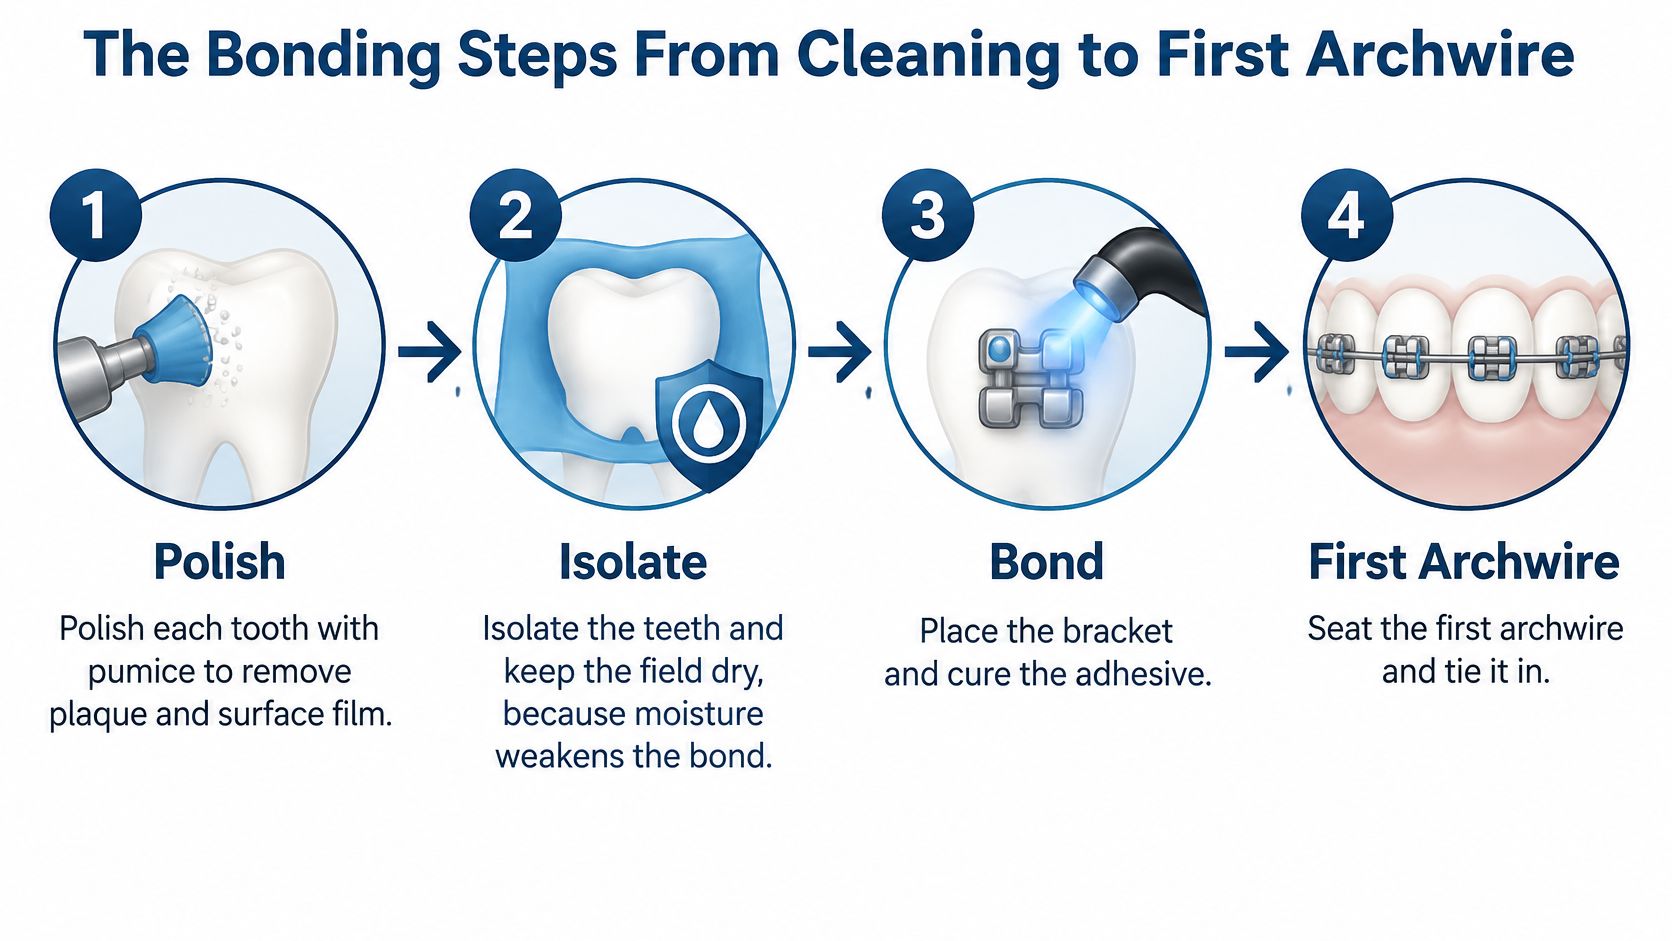
Polish each tooth with pumice. A fine abrasive paste lifts plaque and the salivary film sitting on enamel, so the etch that follows reaches clean mineral instead of coating. The slip that causes trouble is rushing the back molars, where the cheek and tongue make access awkward and plaque hides longest.
Isolate the teeth and keep the field dry. Cotton rolls, cheek retractors, and suction hold moisture away from the enamel, because moisture dilutes the etchant and contaminates the adhesive before it sets. The common failure is a field that stayed dry for the first three teeth and stopped being dry on the fourth.
Etch the enamel with 37% phosphoric acid for 15 seconds, then rinse and dry. Etching opens microscopic pores that give the resin something to grip, and the chalky white surface afterward is what a good etch looks like. Under-rinsing leaves acid behind, and etching a tooth that still carries plaque wastes the whole step.
Apply primer and orthodontic adhesive. Primer wets the etched surface and bridges it to the adhesive. Skipping it because the tooth looks shiny enough is the quiet error that surfaces months later as a failed bracket rather than an obviously bad one.
Seat each bracket and check its position. The bracket presses into the adhesive at its planned height, angle, and rotation, and the orthodontist verifies each one. Off-center seating puts the built-in prescription in the wrong place, and a rotated bracket starts a tooth turning in a direction nobody planned.
Light-cure each bracket for 20 seconds. The curing light hardens the adhesive through the bracket, and the tip needs to aim directly at each one for the full time. Lighting from an angle, or moving on early, leaves adhesive set on the surface and soft underneath.
Place the archwire and secure it with ties. The wire sits in the bracket slot and elastic or wire ties hold it there. A wire that isn't fully seated in the last bracket's slot won't deliver the planned force, and a patient usually notices it as a poking end the next day.
Those reference values come from one documented sequence. In a published clinical bonding protocol, operators cleaned teeth with pumice, etched enamel with 37% phosphoric acid for 15 seconds, applied primer and orthodontic adhesive, then light-cured for 20 seconds per bracket using a curing light with a 440–465 nm wavelength and 1,400 mW/cm² intensity. Other offices use different materials and manufacturer-specific timings, and the treating orthodontist chooses the sequence that fits the adhesive system in front of them.
What the patient actually notices
Very little during the appointment itself. Most of the chair time goes into drying and curing rather than pressing brackets into place, which is why the visit feels longer than it looks from the doorway.
The sensations arrive afterward: the unfamiliar bulk of brackets against the lips, a lisp that fades within days, and pressure as the wire begins working. First-day instructions about soft food, cleaning around the brackets, and using wax on a rubbing spot are worth following closely for the first week.
Families comparing visits can read about how long braces appointments take before booking, since placement is the longest single visit of most treatment plans.
Why Brackets Loosen and How to Prevent It
A bracket can loosen when the bond is weakened or it takes more force than it can handle. The risk tends to be higher in the early months, while patients are getting used to eating and caring for their braces.
In a 2022 study of 150 orthodontic patients, researchers recorded 180 bond failures and calculated an overall bracket failure rate of 6.4%. The study found that approximately 69% of failures occurred within the first six months after bonding and that 58.3% were in patients younger than 18. It also reported that earlier estimates ranged from 0.6% to 28.3%, reflecting differences in bracket systems, adhesives, follow-up periods, eating habits, oral hygiene, and the patients studied.
Several factors can contribute. Moisture during bonding can weaken the attachment between enamel and adhesive. After placement, bite forces may put extra pressure on brackets, especially when a deep bite brings the teeth together over a lower bracket. Hard or sticky foods, bracket location, enamel condition, and cleaning habits can also affect how well a bracket stays attached.
The choice and use of bonding materials matter, too. A meta-analysis of primer use in bracket bonding, involving 199 patients and 3,337 brackets, found 1.5 times the odds of failure for brackets bonded without primer compared with those bonded with primer (odds ratio 1.50; 95% confidence interval 1.10 to 2.05).
Families can help protect the brackets at home:
- Choose braces-friendly foods. Avoid hard and sticky items such as ice, hard pretzels, caramel, and gummy candy. This guide to foods to avoid with braces offers more examples.
- Keep pens and nails out of the mouth. Biting them puts repeated pressure on brackets.
- Use a mouthguard for contact sports. A direct blow to the mouth can loosen a bracket.
- Brush carefully around each bracket. Slow, thorough brushing clears plaque near the gum line and around the appliance.
A single loose bracket is a recognized treatment complication. If one loosens, call the orthodontic office for guidance. Do not try to rebond it at home; the team can advise whether to leave the wire in place or move it away from the cheek until the repair visit.
What Changes in the First Weeks and Months
What should you watch once the braces are in place? The first weeks are a time to build steady cleaning habits and notice changes around the teeth and gums.
The 2025 cross-sectional study of gum health after placement found that gingival inflammation increased significantly within one month of fixed-appliance placement. Brackets, bands, and wires can create spots where plaque collects, so careful cleaning matters from the start. White-spot marks may also develop near the gum line, including on teeth that are harder to see in the mirror.
What to watch at each stage
| Period | What to watch | What to do |
|---|---|---|
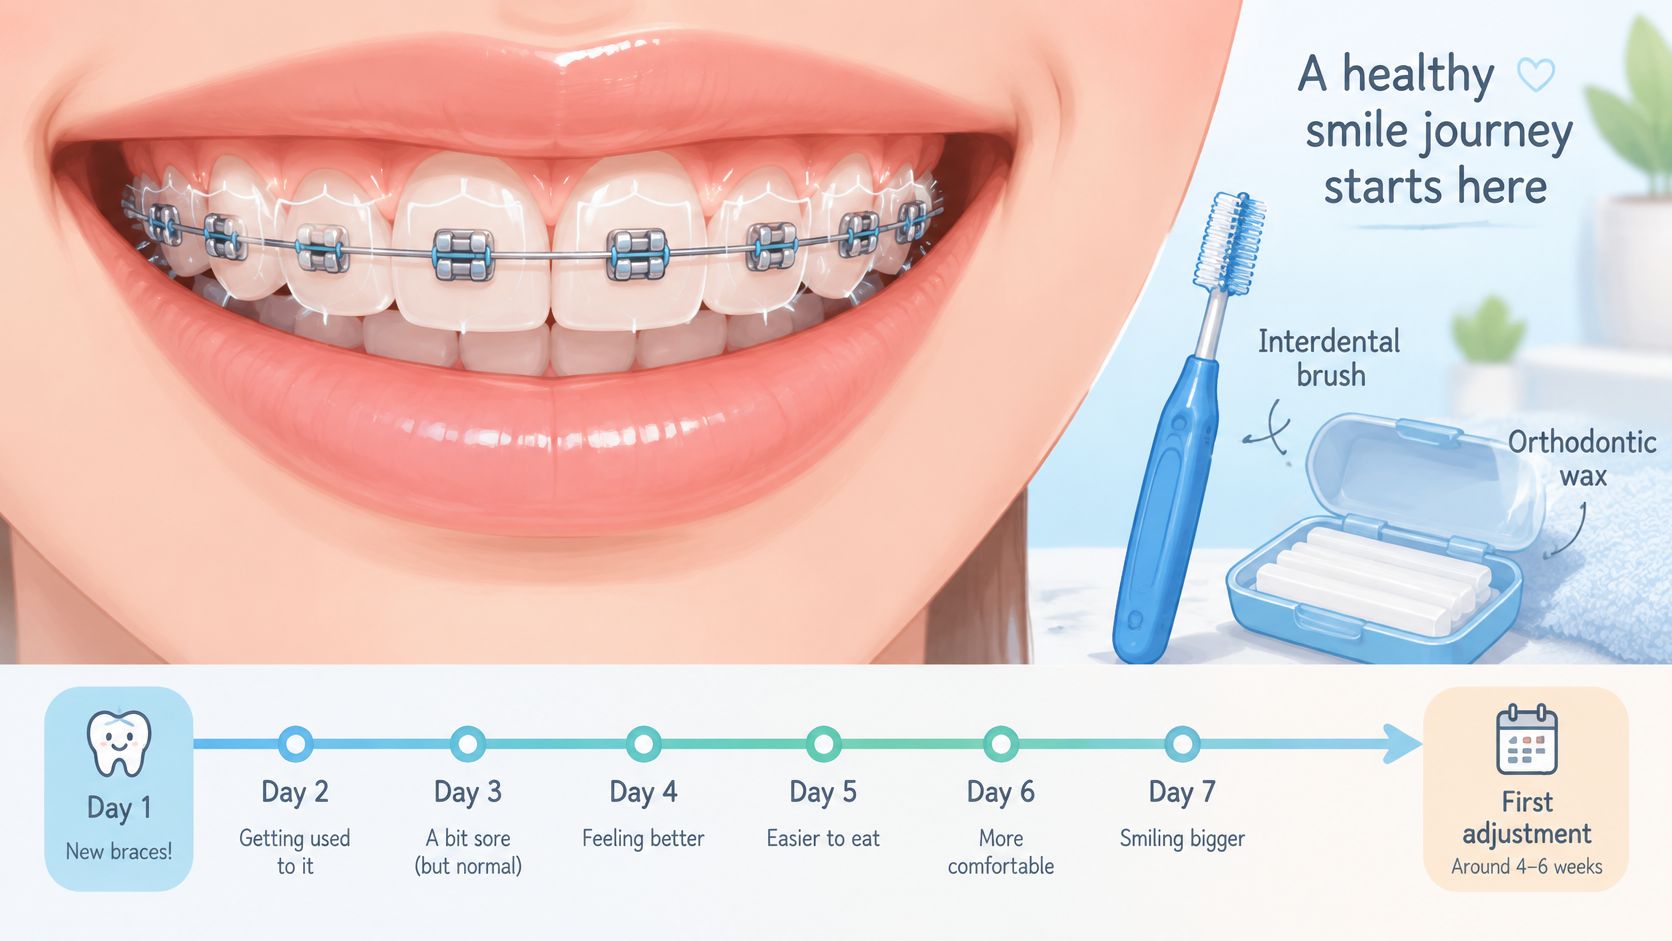
| Days 1 to 7 | Brackets and wire feel unfamiliar | Follow the office's diet and care guidance |
| Weeks 1 to 4 | Plaque may collect around brackets; watch for white marks near the gum line | Brush around each bracket and ask the orthodontist about fluoride |
| Months 1 to 3 | Watch for gum inflammation and chalky marks on teeth | Clean between wires and teeth; contact the office about swollen gums or white marks |
| Adjustment visits | Every 6 to 8 weeks, about 30 minutes each, with the same orthodontist | Keep appointments and ask the office for its schedule |
| Total treatment length | Most braces cases finish in 18 to 30 months, though timing varies | Confirm the expected length for your case |
The routine that protects the enamel
- Angle the brush above and below each bracket. Aim the bristles toward the top edge, then the bottom edge, and brush the bracket face too.
- Use an interdental brush under the wire. It can reach spaces a regular toothbrush may miss. Clean between the wire and tooth at each gap.
- Ask whether fluoride is appropriate. The orthodontist can decide case by case whether fluoride varnish or a high-fluoride toothpaste may help.
- Pay attention to how often sugary foods and drinks appear. Frequent exposure gives plaque more opportunities to affect enamel, so follow the office's advice on eating and drinking.
- Mention chalky white marks or bleeding gums promptly. The orthodontist can assess what is causing the change and advise you on care.
For a sense of how the appliance settles in during the first days, this short video covers the adjustment period.
The first months are when new cleaning habits become part of the daily routine. Keep an eye on the gum line and the areas around brackets, and bring any concerns to the orthodontist at an appointment.
Book a Free Consultation at Stellar Orthodontics
What will happen at the first visit, and how will you know what treatment may cost? Stellar Orthodontics offers a free consultation, whether or not your family proceeds, insurance covers treatment, or your child qualifies for Medicaid braces.
The visit includes a full orthodontic exam, a 3D iTero scan, and a printed treatment plan with transparent pricing before you leave. The six steps take about an hour: check-in (5 minutes), meeting the orthodontist (5 minutes), clinical exam (10 minutes), scan and x-rays (15 minutes), treatment plan (15 minutes), and financial walkthrough (10 minutes).
During the planning step, you can see your teeth in 3D on a screen, along with a visual preview of your final smile. That gives the orthodontist and your family something concrete to discuss when reviewing treatment options. The orthodontist who would treat your case runs the consultation.
Use the question list from the previous section to guide your conversation. If you decide to proceed, Stellar calls your family the same day after approval and typically schedules braces placement within 1 to 2 weeks. Teeth respond differently, so your orthodontist can explain what to expect for your case.
Free consultations with iTero scanning are available at Stellar's four Delaware offices: North Wilmington, Middletown, West Dover, and Millsboro. To discuss bracket placement and timing, book at the location that works best for your family.
Stellar Orthodontics provides braces and Invisalign for children, teens, and adults across Delaware. At a consultation, the team can explain how bracket placement would be planned for your teeth and whether direct or indirect bonding suits your case. Book a free consultation at Stellar Orthodontics.